709-218-7927 The Landfall Garden House 60 Canon Bayley Road CANADA A0C 1B0 |
|
|---|
.JPG)
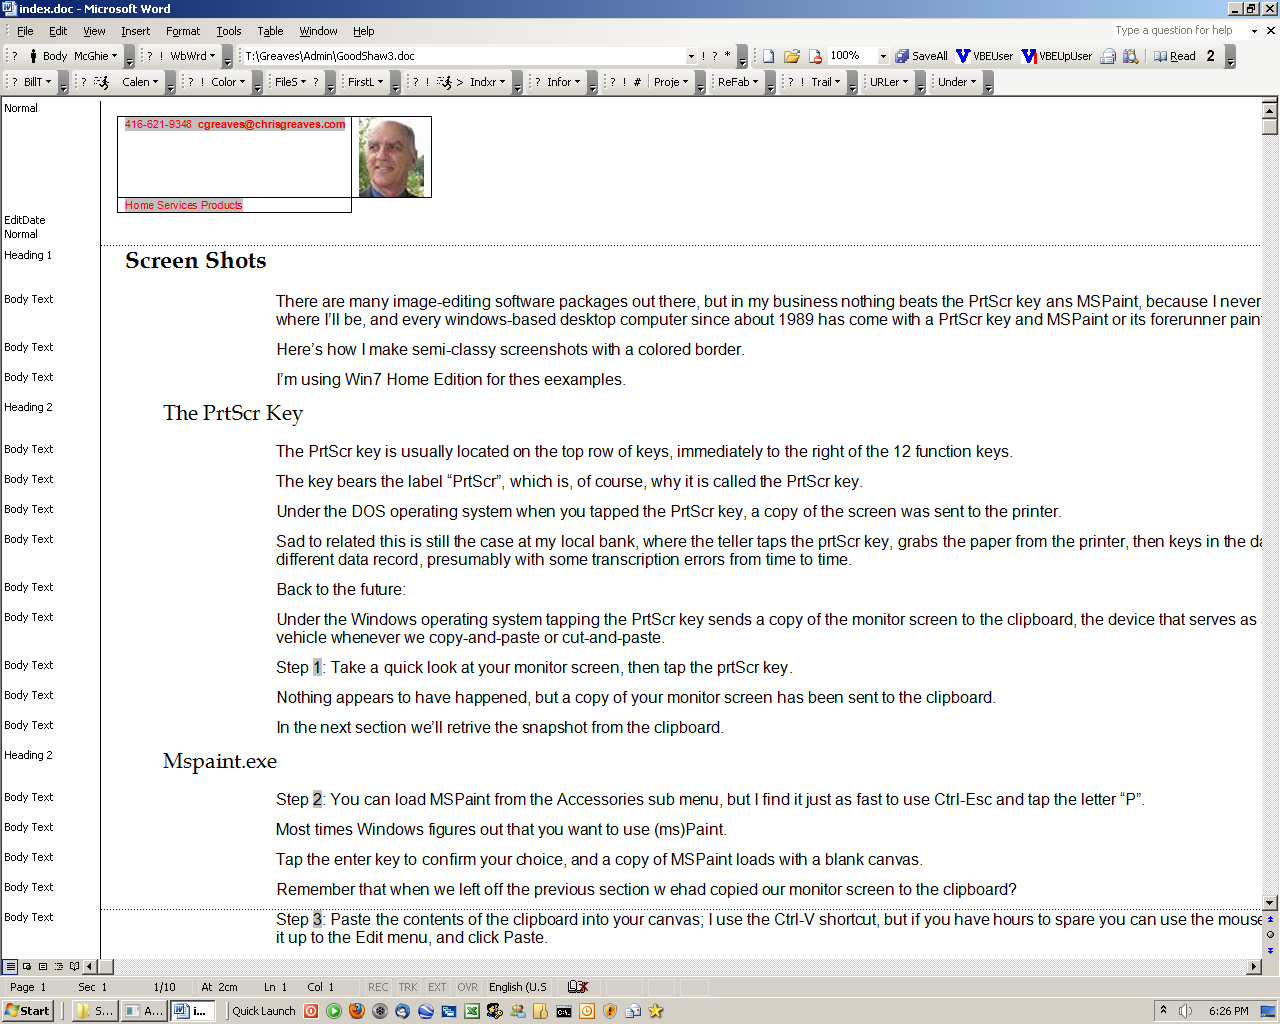
Screen Shots
There are many image-editing software packages out there, but in my business nothing beats the PrtScr key and MSPaint, because I never know where I’ll be, and every windows-based desktop computer since about 1989 has come with a PrtScr key and MSPaint or its forerunner paintbrush.
Here’s how I make semi-classy screenshots with a colored border.
I’m using Win7 Home Edition for these examples.
The PrtScr Key
The PrtScr key is usually located on the top row of keys, immediately to the right of the 12 function keys.
The key bears the label “PrtScr”, which is, of course, why it is called the PrtScr key.
Under the DOS operating system when you tapped the PrtScr key, a copy of the screen was sent to the printer.
Sad to related this is still the case at my local bank, where the teller taps the PrtScr key, grabs the paper from the printer, then keys in the data to a different data record, presumably with some transcription errors from time to time.
Back to the future:
Under the Windows operating system tapping the PrtScr key sends a copy of the monitor screen to the clipboard, the device that serves as a vehicle whenever we copy-and-paste or cut-and-paste.
Step 1: Take a quick look at your monitor screen, then tap the PrtScr key.
Nothing appears to have happened, but a copy of your monitor screen has been sent to the clipboard.
In the next section we’ll retrieve the snapshot from the clipboard.
Microsoft Paint.Exe
Step 2: You can load MSPaint from the Accessories sub menu, but I find it just as fast to use Ctrl-Esc and tap the letter “P”.
Most times Windows figures out that you want to use (ms)Paint.
Tap the enter key to confirm your choice, and a copy of MSPaint loads with a blank canvas.
Remember that when we left off the previous section we had copied our monitor screen to the clipboard?
Step 3: Paste the contents of the clipboard into your canvas; I use the Ctrl-V shortcut, but if you have hours to spare you can use the mouse, slide it up to the Edit menu, and click Paste.
You will see something like this:-
Now this might be confusing to you, especially if you are addicted to the mouse, because the screenshot of your monitor screen, naturally enough, looks just like your monitor screen, and you’ll be tempted to Click and nothing will happen until you Alt-Tab back to your application.
Step 4: Save your work in MSPaint just in case we make a mistake in the next step.
The Cropping Tool
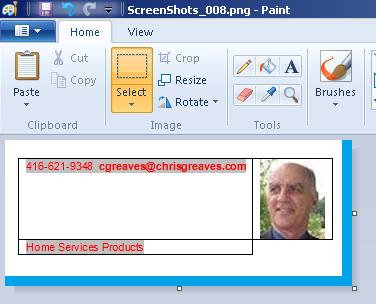
Most of the time I need just a small portion of the screen to embellish whatever technical paper or training course I’m writing.
In this case I’d like to use the little header block that contains my smiling face.
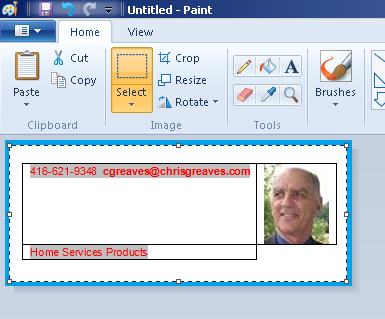
Step 5: I select the cropping tool by clicking on it
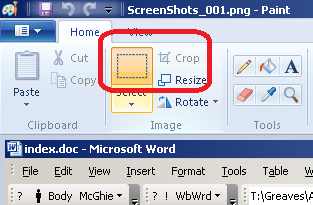
Step 6: Next I click-and-drag the cropping tool to outline, with a faint dashed line, just the part of the image I want.
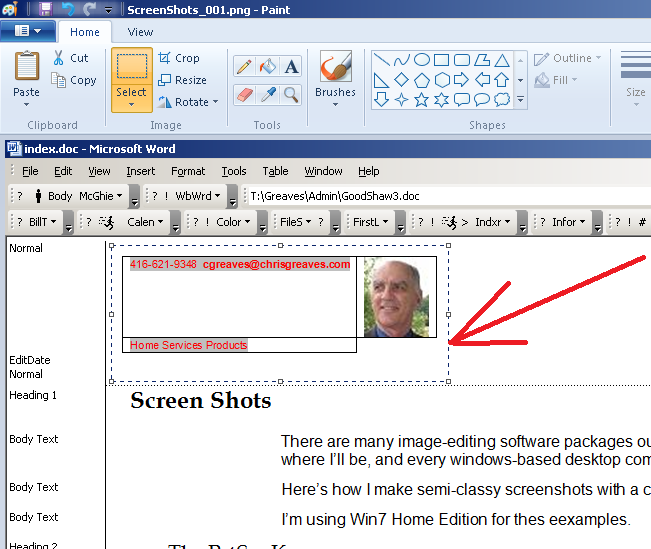
Step 7: Once the area is selected, I use the Shift-Ctrl-X shortcut to reduce the image to just the selected area.
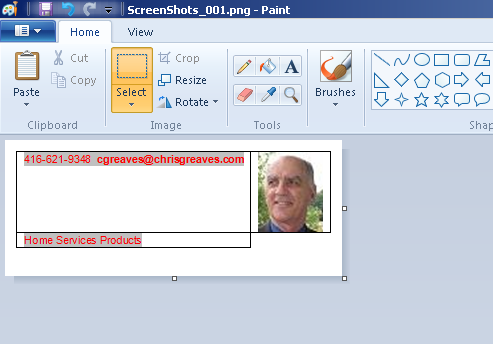
Step 8: I save my work again.
Bordering on the Sane
The last little process involves placing a colored border around my screen shot, otherwise the whit background of my image will merge into the white background of my document.
I need to give my reader a visual clue that this is an image, not a chunk of text.
The trick here lies in carefully “lifting” the image from the screen, painting the floor underneath it, so to speak, then placing the image back on the screen.
Step 9: Select the entire image (Ctrl-A) and cut it to the clipboard (Ctrl-X)
Your canvas is blank, clear, empty.
But your image is safely held in the clipboard.
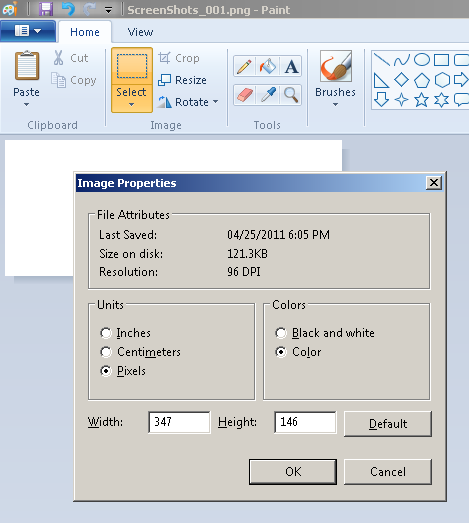
Step 10: Use the Ctrl-E shortcut to observe the size of your canvas.

My canvas is 337 pixels wide and 136 pixels high.
I would like a 5-pixel colored border around my image, which would add 10 pixels (5 pixels on each side) to the image.
Step 11: So I key in values 10 pixels greater than the ones given there, in my case 347 pixels by 146 pixels.
Step 12: Now I choose the color I’d like for my border, and the paint-pot tool
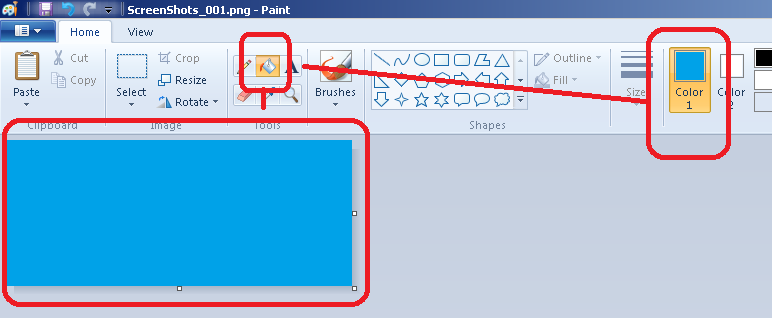
Step 13: Click the paint-pot tool in the centre of the blank canvas to fill the canvas with color.
Now my enlarged (by 5 pixels on each side!) canvas is completely blue.
Remember that we had Cut our screenshot to the clipboard?
Step 14: Paste it back in with Ctrl-V
Now in the image above you can see that the image is sitting in the top-left corner of the canvas.
Paintbrush and MSPaint have always pasted into the top-left corner.
You can see too that the pasted chunk is selected – made evident by the little square handles at each corner and in the middle of each side.
Step 15: Slide (don’t drag) your mouse to the centre of the selected image, then drag the image to the centre of the canvas until the borders on each side look equal – in my case 5 pixels each.
There!
We’re done.
Step 16: Save your work
The Steps Recapitulated:
Step 1: Take a quick look at your monitor screen, then tap the PrtScr key.
Step 2: Load MSPaint.
Step 3: Paste the contents of the clipboard into your canvas.
Step 4: Save your work.
Step 5: Select the cropping tool.
Step 6: Click-and-drag to outline just part of the image.
Step 7: Use Shift-Ctrl-X to reduce the image to just the selected area.
Step 8: Save your work.
Step 9: Select the entire image (Ctrl-A) and cut it to the clipboard (Ctrl-X).
Step 10: Use the Ctrl-E shortcut to observe the size of your canvas.
Step 11: Key in values 10 pixels greater than the ones given.
Step 12: Choose the color for your border, and the paint-pot tool.
Step 13: Click the paint-pot tool in the centre of the canvas.
Step 14: Paste your image back in with Ctrl-V.
Step 15: Drag the image to the centre of the canvas.
Step 16: Save your work.
709-218-7927 CPRGreaves@gmail.com Bonavista, Thursday, December 17, 2020 7:23 AM Copyright © 1996-2020 Chris Greaves. All Rights Reserved. |
|---|